

Welcome to Cricut! It will be fun they said. What a laugh that turned out to be. Cricut has a huge learning curve and to be honest it was not all that fun.
UNTIL IT WAS! Then it was AWESOME!!!
I'm still at it and I want to tell you all how I got here. Quick no BS content to follow.
Everything Cricut you need to make this project is available thru this link.
Click Here to Shop Cricut ← click the highlighted text :)
Throughout this Blog if you see Highlighted Text you can click on it to purchase the exact products I used for this project. Be sure to sign up to my monthly newsletter for Mandala of the Month starting Feb 2022. I'll share all the deals from companies I am an Affiliate for and if you live in Canada or the USA you will be entered into the Dish Towel of the month draw....all this and more in my newsletter! Join today!
Now onto the show....
Step 1...
Get yourself the Cricut Maker I bought a bundle that included Blades, Mats and Tools. The Cricut Maker is perfect for this job but you will notice when you receive you download that I have included files in other formats in case you have a different machine.
The number one question I get asked is how did I pick my colors. Ladies and gentleman its not complicated. And stores like Michaels make it even easier by placing coordinating colors together.
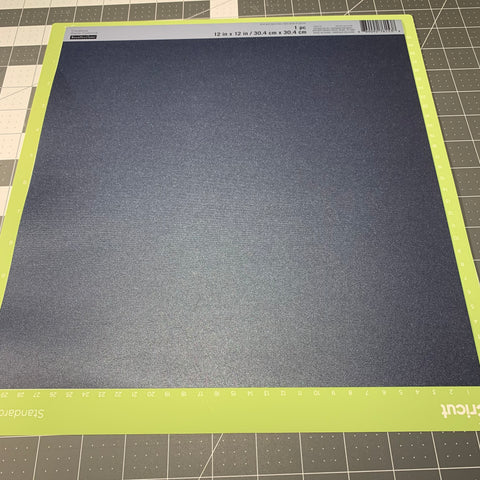
I personally used their Recollections Collection of Papers with the sparkly finish for this project. I picked the thickest paper in the collection. I purchased some paper in every color and then mix and match the layering. I try not to mix too many brands of paper in my Mandalas because I feel it takes away from the design. I want my to look and feel as expensive as they are to create.

I then layer the colors and often like to mix light to dark with dark on the bottom so it draws my eye into the project. Admittedly I have a background in computer things and photography. But don't let this stop you from getting started. Just follow along with this blog. Or hit this link to watch the entire YouTube video. Pause the video for each step so you don't get frustrated.
https://youtu.be/RVsl0pxN_a0
Step 2...
If ever there was a project to purchase a new blade and mat for this is the project!!! For real peeps! These can turn out amazing, or they can make you cry. You already bought the good paper so don't waste it trying to baby wipe your old mat into new life. I strongly recommend using Cricut Standard Grip Mats for this project. So step 3 is buy yourself new mats and Blades if you don't already own them! I use the Fine Point Blade by Cricut.
Step 3...
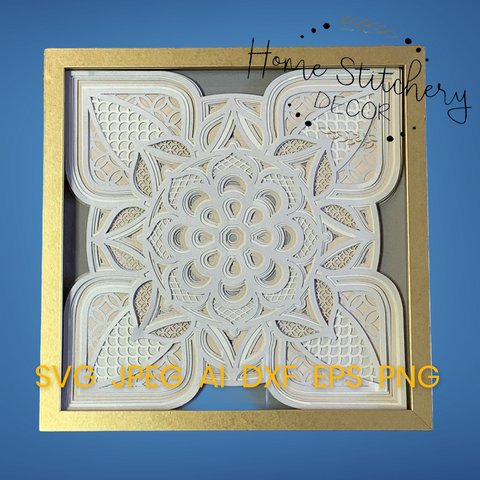
Now you need your pattern. No need to search I have these available for purchase! How cool is that? It's almost like I planned this...oh wait I did! I will be honest it is my entire business plan.
My Company Motto is Niche Down and Branch Out.
DESIGNS HERE

|
Click on the highlighted text. |
|
Click on the highlighted text. |
 |
 |
Click on the highlighted text. |
|
Click on the highlighted text. |
 |
 |
Click on the highlighted text.
|
Original Designs owned by Home Stitchery Decor.
Step 4...
Now that you have purchased your pattern you will need to Extract it and Upload it into design space. This really isn't that hard and I am going to take you step by step thru the process. I searched and searched for a video showing this and to be honest they kinda feel flat. They go to fast or don't use language for beginners.
This process is for Windows Programs. I will search and Post Instructions for other programs such as Mac and will include those instructions soon.
Once you receive your email confirmation of purchase click the link in the email. A box will pop up.
 |
 |
Step 5...
Upload each image to Design Space. Open Cricut Design Space and click NEW PROJECT
Now Go to your Downloads folder by clicking the Yellow Folder Box on your screen, the Down Arrow in your Browser Bar or the Three ... on your Search Bar.
Select the Folder without the zipper on it that you created in the last step. Select the SVG and upload each SVG. Each Mandala has layers. You need to Upload each layer. So you will repeat this step until you have each layer Uploaded into Design Space.
Once your SVG images are uploaded into Design Space you will need to Insert Images. Select the Images you have just uploaded by clicking on them. Once you have them highlighted click INSERT IMAGES.
Step 6...
Holy Moly!!! Will you look at that, all your SVG files popped up and are ready for you to put the finally touches on. Great news...I made this part kinda easy.
So on your Cricut Maker it cuts up to a certain measurement. And if you exceed that measurement you will not be able to cut the project. What's the magic number? It's 29.20cm. For this project your cut cannot exceed 29.20cm in either width or height.
So what I like to do is turn off all the Mats except the first one. Do this by clicking on the Eyeball on the right of each image.
Now you should only have one Image up on your screen. Let's check the measurements. Make sure the width and height do not exceed 29.20.
Step 7...
Line your paper up on the mat on the line closest to you and lay it flat pushing away from yourself. If you try to line it up on the line further away it never lines up as straight. With clean dry hands press the paper firmly down on the mat.
Feed the paper into the machine Sticky side First. I never feed the paper in with the cut off end because there is a chance the paper will twist. So sticky first for best results!

Lets select our cut features now. Every machine, mat and brand of Card Stock is a bit different. So I am going to tell you what I am using for my cuts for this exact project with this exact brand of Card Stock. Machines can be calibrated a tiny bit different one machine to the next. TEST CUT. This paper is pricey. Which is why I recommend that you start this project with new mats, new blades if you haven't replaced yours recently and a whole lot of patience.
I'm using Recollection Collection Card Stock from Michaels. They have several on the shelf but I like the thickest one I can find. For me it cuts better, has fewer mistakes and I can often cut entire projects with no tearing.
 |
 |
| I use 80lb Cardstock Settings. |
With More Pressure. I cut twice. |
Cutting your project twice is easy! Once you have completed the first cut just hit the C again. Don't touch the project or the arrow button. If you eject the cut and try to reinsert the project for a second cut it will not line up - again in my experience. If I try to reinsert the project always cuts a tiny bit off. So just hit that C button again and let the machine do it's thing and you will have clean crisp cuts.
Step 8...
Now comes the fun part. Getting this off the mat without it tearing is tricky for sure. Flip it over and peel the mat away from the Mandala instead of the Mandala away from the mat. Look here I took a picture for your convenience. :)

Step 9...
Repeat steps 1-8 for each layer. Then attach the layers. If you weren't frustrated already this will about do you in! The first ones go pretty quick and then the top layers hit and you will be wondering how tiny can you actually cut sticky foam tape? Well it's teeny tiny pieces that get the of depth of this project and you don't want any double sided foam tape showing.

Can you see the mistake? Look Close, a tiny piece of tape is sticking out. So I had to lift this up and cut that piece again smaller.
Step 10...
You made it! You are almost done. Just one more thing; assembling the shadow box. It's the easiest thing of this whole project. Take your box apart and clean the glass. Make sure it is 100% dry. Then cut off the branding end (rotary cutter, mat and cutting ruler recommended) so you have 1 12x12 sheet of card stock in the background color of your choice. Center your Mandala on the sheet and have a good look to make sure everything is as it should be. Nothing twisted, no tape sticking out etc.
Now flip the Mandala over and grab some flat double sided tape. I like the Scotch Brand. Place some tape on the back of the Mandala. Flip it back over, center it again and press it down on the background paper. Reassemble your box and you are done!!! Here are some pics of mine.
 |
 |
 |
 |
 |
 |
YOU MADE IT!!!
THANK YOU!!!
Thank you for supporting my small business and letting me build my dream of working at a crafting business. How lucky am I!
If you do make something from one of my patterns I really want to see it! So follow me on Socials and tag #homestitcherydecor so I'm sure to see your imagination take over my patterns.
SO FUN!
Here's a bunch of links for products used in this project.
Just click on the highlighted text.
Here are all the links to all the socials!
© Home Stitchery Decor
All Rights Reserved
Thank you for supporting a small business!